If you’re considering raising a backyard flock of chickens, one of the first things you need to consider is where to put your new chicks when you bring them home. Whether ordering from a hatchery or picking them up at your local farm store, there’s a lot to prepare before you get your fluffy new flock.
And while it may seem overwhelming with all the choices – feed, bedding, heater, and other equipment- you can certainly make do on a simple budget. When we got our first flock, we found several things around the home that we could temporarily repurpose. Just like us, chickens need the basics: shelter, food, water, and caretaking.
In this post, I’ll share how we created a simple brooder system using inexpensive household items that provide all the necessary supplies for a warm, clean, and safe home.
What You’ll Need to Consider
- Choosing a basic brooder container
- Keeping chicks warm
- Bedding options
- Water and feed setups
- Planning for growth
- Daily care and health checks
- Brooder safety
- Transitioning out of the brooder
- Additional chicken care resources
Choosing a Basic Brooder Container

A chicken brooder is a simple container that can safely hold chicks, keep them warm, and allow them to grow in comfort for the first six to eight weeks of their lives. Experts recommend at least ½ a square foot of space per chick to prevent overcrowding. It needs to be tall enough so they can’t jump out, easy to reach in and clean, and fit the space you’re placing it.
Brooders can be repurposed from common items, like a storage tote, an extra stock tank, or a wooden box crafted from scrap wood. We found an extra storage tote with our Christmas decorations. We wanted to allow air flow as well as protect the chicks from our cats, so we pulled a metal rack from one of the shelving units in the garden shed to cover it.
Keeping Chicks Warm
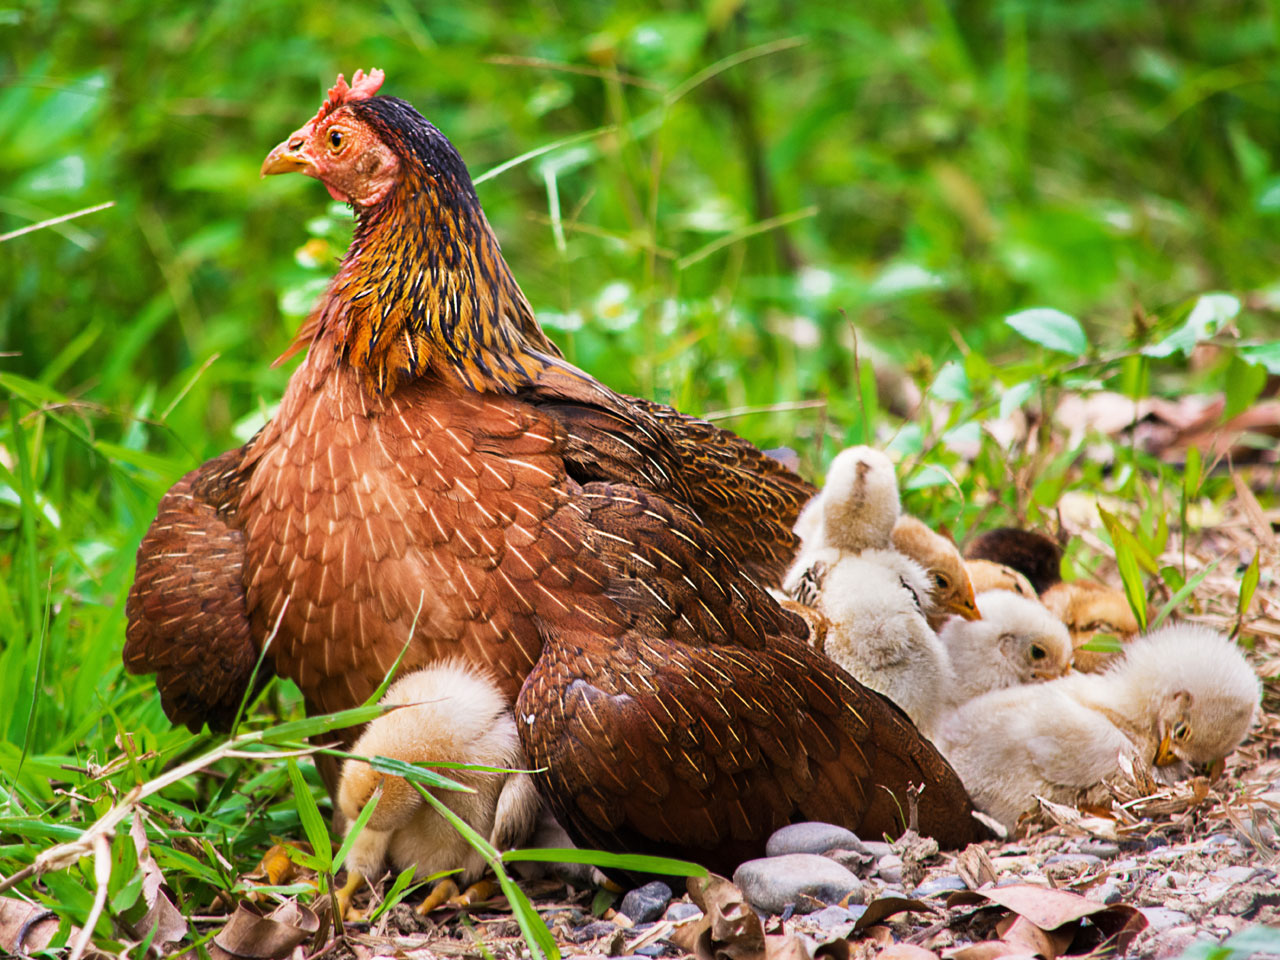
When a chick hatches, it can’t regulate its body temperature at first. In nature, the chicks stay under their mother hen, and it’s her body heat that keeps them warm. In a brooder, we need to replace that mother hen’s warmth and protection.
This is one step where being frugal isn’t always the best option. Choosing a good-quality heat source is important. What worked for us was a heat plate that could be raised as the chicks grew taller. It also gave them that sense of being under cover, like under a hen’s body.
Many people also use heat lamps. When I was a kid, that’s what my parents used out in the garage. But in the house, I prefer a heat plate.
When you first bring chicks home, have the brooder set up and the heat source already on. It’s best to start with a very warm setting and gradually, over the weeks, reduce the temperature (or raise a heat lamp) until their feathers start coming in and they can regulate their own temperature.
We learned how to adjust the temperature just by watching how much time the chicks spent under the heat plate. If they huddled under it, close together, they were cold. If they spent time on the opposite side of the brooder, we knew they were too hot and trying to get away from the heat. And when they started using it as a roost instead of spending time under it, we knew it was no longer needed.
Just like any baby, keeping a close eye on them, especially in the first few weeks, is essential to their overall growth and helps them to become strong, healthy chickens.
Bedding: Cheap, Clean, and Comfortable
Bedding serves several purposes for your chicks. It provides a clean space to walk, soaks up the moisture of their waste, and gives them a substrate to scratch around. It’s important to find something that doesn’t stay wet or create a lot of dust.
You can find specialty products for sale, like absorbent hatchling liners, brooder pads made from wood or jute, sand, and fine pine shavings. While all of them have their pros and cons, we used simple, inexpensive (or free) materials.
For the first two days, we started with layers of newspaper on the floor of the brooder. We remove the top layer once a day. The chicks scratched and tore the paper quickly, so we switched to sifted sand over newspapers. Our chicks loved the native sand from our backyard, but it’s very fine and stirred up a lot of dust.
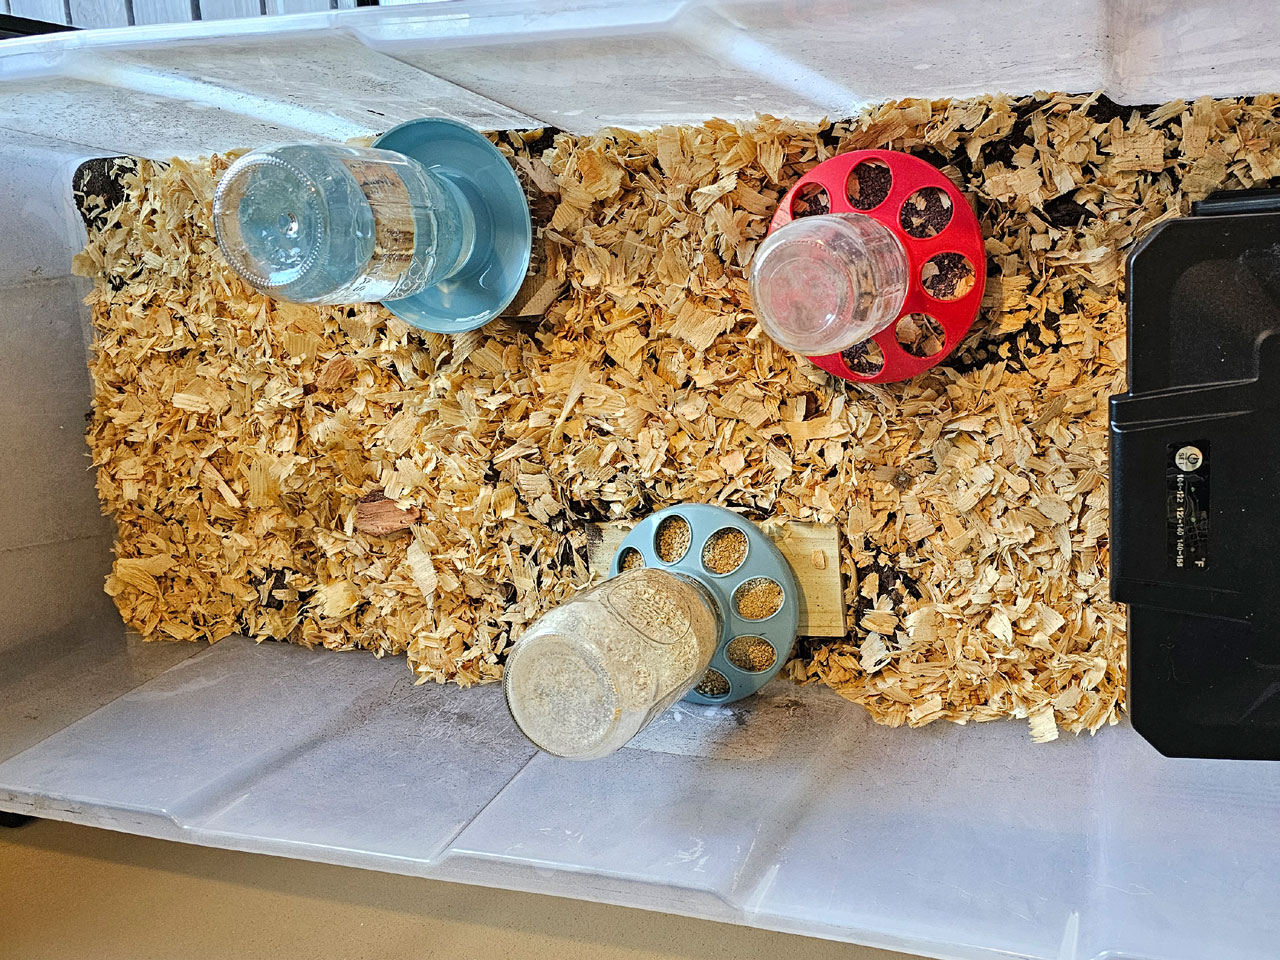
After a few days, we cleaned out the brooder and settled on fine pine shavings. They loved scratching around in that, and we kept it deep enough so their feet weren’t always on the hard plastic surface. We did a daily light cleaning, and once a week, we refreshed the bedding completely, sprinkling a bit of food-grade diatomaceous earth into it. We kept the chicks in the laundry room, and there was no noticeable smell from the brooder.
Water and Feed Setups
Your brooder is used for only a short time, so simple feeders and waterers can cut down on your setup costs. Consider your space and the number of chicks in your brooder, and choose the smallest setup that still works well.
Feeders
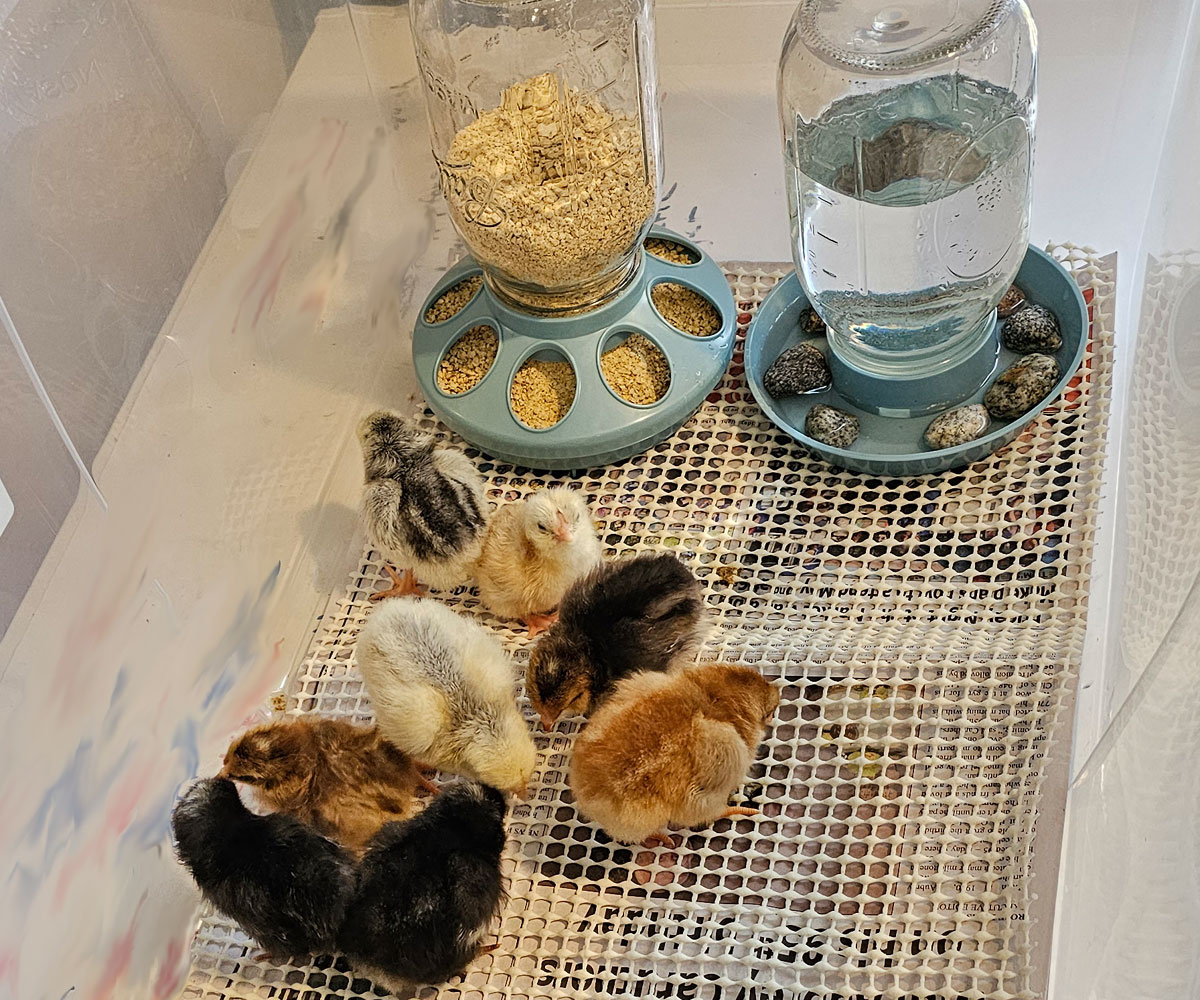
There are many styles, including trough feeders, raised feeders, and simple feeder bases that screw a quart jar. We tried both a small trough feeder and a feeder base (since we have plenty of quart canning jars). The chicks liked to perch on the trough, so we removed it and stuck with the simple quart jar feeder.
Waterers
Waterers come in similar styles. Just like a feeder, make sure they’re small enough to fit your brooder without crowding the chicks. An upright design, like the quart jar with a base, leaves more room for chicks to move around.
When we first brought our chicks home, we placed a few rocks in the tray to prevent drowning and changed the water a couple of times a day. As they got older, we raised the waterer on a small block of wood. That helped keep the water cleaner and reduced splashing, since they couldn’t step into it.
Feed
Chicks grow fast, so you want them to get a good start for a healthy life. With so many starter feeds to choose from, it’s important to choose one that supports that quick development.
A good starter feed should be:
- 20%–24% protein
- Sized for chicks (we prefer crumbles)
- Organic or conventional, depending on your goals
- Medicated or non-medicated, depending on your preference
We also introduced native soil into their brooder. I’d dig up a small plug of grass so they could scratch through the roots and nibble at the leaves. This helped them start exploring natural materials early, the way chickens naturally would outdoors.
Grit
Grit is an essential element of chicken feeding. Birds use grit (small pebbles or rocks) to help grind the feed in their crop. We offered chick grit from day one, serving it in a small feeder. When we moved them to the coop, we gradually introduced the adult-size grit over the next several weeks as they grew.
A Few Tips
The bases we bought cost us about six dollars each. They’re easy to clean, don’t take up much space, and can also be repurposed in the larger coop for serving laying hen calcium.
We kept the feed and water at one side of the brooder, and the heater at the other. This made quick clean-ups easier.
Simple setups work best in a brooder—and the less mess your feed and water create, the easier chick care becomes.
Planning for Growth
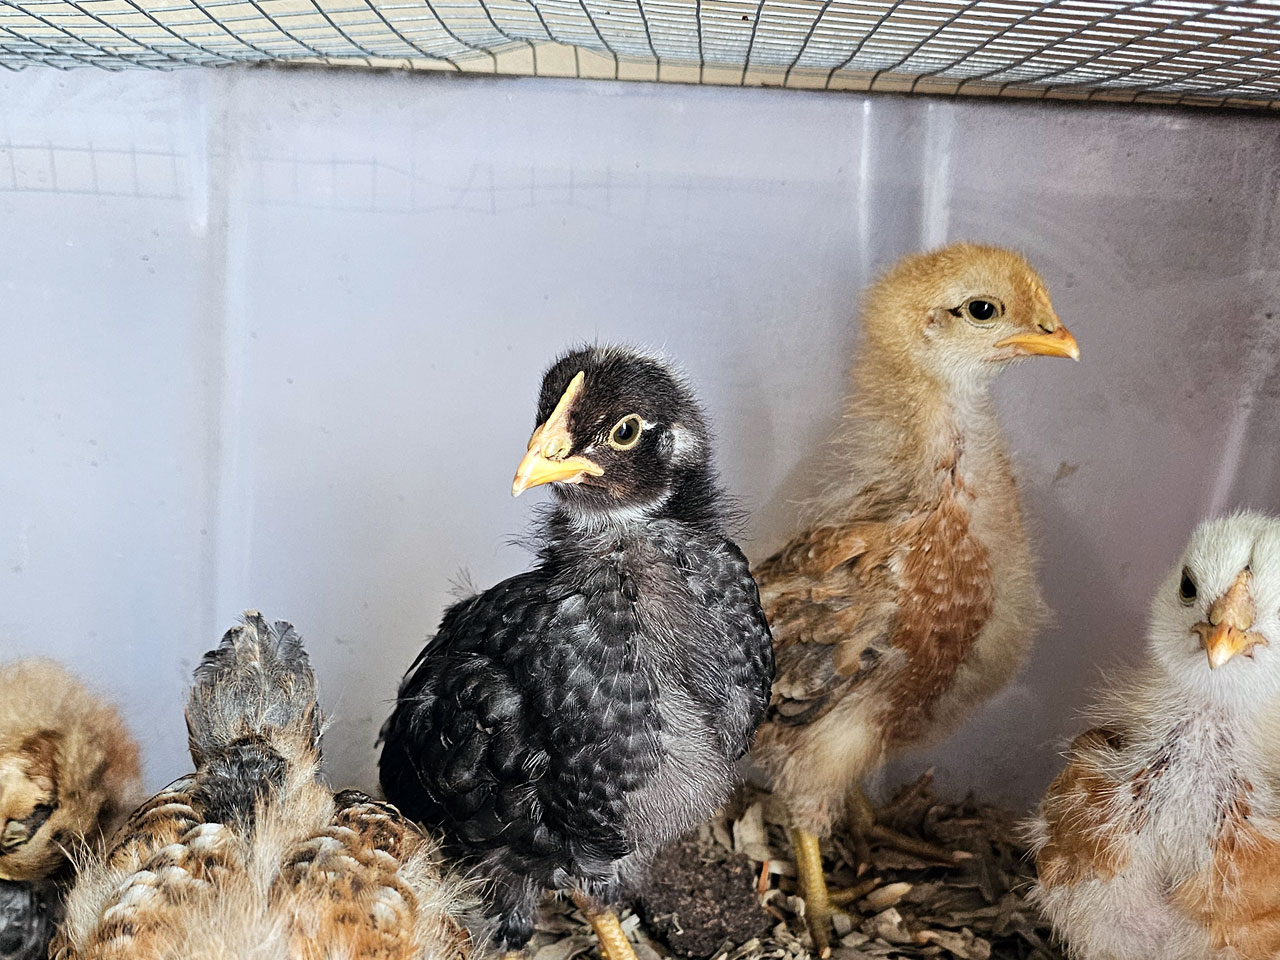
It’s amazing how fast those cute little fluffballs can turn into awkward, half-feathered eating machines! We had to make several changes in the brooder to keep up with their growth.
Raising our heat plate so they could stand upright underneath it was one of the most obvious signs of how quickly they were growing. At least once a week, we’d raise it slightly. By week 4, they were using it more like a roost than a heater, and they weren’t trying to stay warm.
Once the heat plate was no longer needed, we replaced it with a few low roosts made from scrap wood. They loved having something to perch on, even at that young age.
Around the same time, we also noticed how quickly they started outgrowing their space. The brooder that felt roomy in the first week suddenly felt crowded, and keeping it clean became more challenging as their droppings increased.
To make brooder clean-outs easier, we found a tall tote to temporarily hold them in while we refreshed the bedding. A heavy old towel worked well as a cover. The darkness calmed them down, and it gave us time to clean without chasing chicks around the laundry room.
When their feathers started coming in, we occasionally offered them a small treat of a few mealworms to add a little extra protein for feather growth.
By the time chicks hit that awkward teenage stage, you’ll quickly realize how temporary a brooder is – and want to start getting everything ready for their permanent home.
Daily Care Routine & Health Checks
While chicks require daily care, you don’t need to hover all day attending to their needs. A few quick check-ins will keep them comfortable, thriving, and help you catch small problems early.
Every morning, I’d give them fresh feed and clean water. I’d spot-check the bedding and top it off with a few scoops of pine shavings if needed. I’d check the heater to make sure it was still working and set at the right height. I also made a point to gently pick up the chicks so they stayed comfortable with handling.
Then I’d go outside, find a fresh plug of grass or a chicken-safe edible weed, and treat them. Oh my—how they loved that fresh food!
In the late afternoon, I’d refresh their feed and water again. Then at sunset, I’d do one last check: make sure the heater was steady, the brooder was tidy, and everyone looked settled for the night. It became a natural routine for me, taking no more time than my daily routine, now caring for the hens.
What to Watch For (Especially in the First Week)
- How alert and active the chicks are
- Pasty butt (a common newborn issue)
- Sneezing or breathing difficulty
- Leg and foot issues, like splayed legs or crooked toes
Most chick problems show up early, so a quick daily routine makes it much easier to catch them before they become serious.
Brooder Safety
A brooder doesn’t need to be complicated, but it does need to be safe. Most brooder problems come down to a few simple issues: heat, pets, spills, and sanitation. Once you set things up with safety in mind, the rest of chick care becomes much easier.
Secure Your Heat Source
Whether you use a heat plate or a heat lamp, make sure it’s stable and can’t be knocked over. If you’re using a heat lamp, use a secure clamp and keep it safely away from anything flammable. If you’re using a heat plate, check it often to make sure it stays level and at the correct height as your chicks grow.
Be Careful with Sunlight
Sunshine is healthy for chicks, but direct sun can quickly overheat a brooder, especially if you already have a heat source in it. Keep chicks out of direct sunlight inside or allow a short time supervised in the sun. If the chicks start panting or spreading their wings away from their body, they’re too hot.
Keep Pets (and Curious Kids) Out
Even the sweetest house pets can be a danger to chicks, and a curious cat or dog can stress them out just by hovering nearby. We kept our brooder covered and made sure the chicks were protected from our cats at all times.
Watch for Spills and Wet Bedding
Water is one of the biggest troublemakers in a brooder. Wet bedding can lead to odor, cold chicks, and unhealthy conditions fast. Keeping the waterer raised as the chicks grow and spot-cleaning damp areas daily goes a long way.
Avoid Drafts
Chicks need fresh air, but they don’t do well with cold drafts. If your brooder is indoors, choose a spot that stays steady in temperature and isn’t in the path of a vent, fan, or frequently opened door.
Keep Things Clean
A brooder doesn’t have to be spotless, but it should stay dry and reasonably clean. A quick daily bedding check and a weekly refresh help prevent most issues before they start.
Transitioning Out of the Brooder
A brooder is only temporary, and it feels like such a big step moving the chicks out. But once they’re ready, they’ll thrive in their new space.
For us, some of the biggest signs that they were ready to move were simple: they no longer needed the heat plate, they were perching regularly, they emptied the feeder and waterer much faster, and they were starting to crowd each other in the brooder.
If your coop is ready, moving them out is often the easier option. If it isn’t, then you may need to temporarily expand their brooder space or set up a larger indoor area until their permanent home is finished.
When we moved our chicks out, we continued to keep an eye on them for the first couple of days. While we had made what we considered a “chicken fortress,” those first couple of nights still made us nervous about predators or drafts in the coop. Keeping our routine, just like when they were in the brooder, helped them feel safe and set our minds at ease.
Next Steps
If you’re preparing for your first chicks, I hope this post gives you some peace of mind. A brooder doesn’t need to be expensive or complicated to work well. As long as your chicks have warmth, clean bedding, fresh food, and water, and a safe space to grow, you’re off to a great start.
And honestly, the best tool you have isn’t a fancy setup – it’s your attention. Chicks are surprisingly good at telling you what they need if you take a moment to watch them.
Before you know it, those tiny fluffballs will be outgrowing the brooder and heading toward their permanent home. And if you’re anything like me, you’ll already be thinking about what you might do differently the next time around.
Leave a Reply