Loquats are a bright yellow to yellow-orange fruit grown in subtropical and tropical zones 8 – 10 here in the United States. They’re not often found in stores, and only occasionally at farmer’s markets. They are a tender fruit that bruise easily which makes them difficult to sell at markets.
However, if you’re lucky enough to be able to grow them, forage them, or have a neighbor that grows them as an ornamental, these fruits make a tasty spread for sandwiches, a sweet mix-in for BBQ sauces, and stand-out jam for holiday jam-filled cookies.
Here’s how to turn these gentle fruits into a delicious jam.
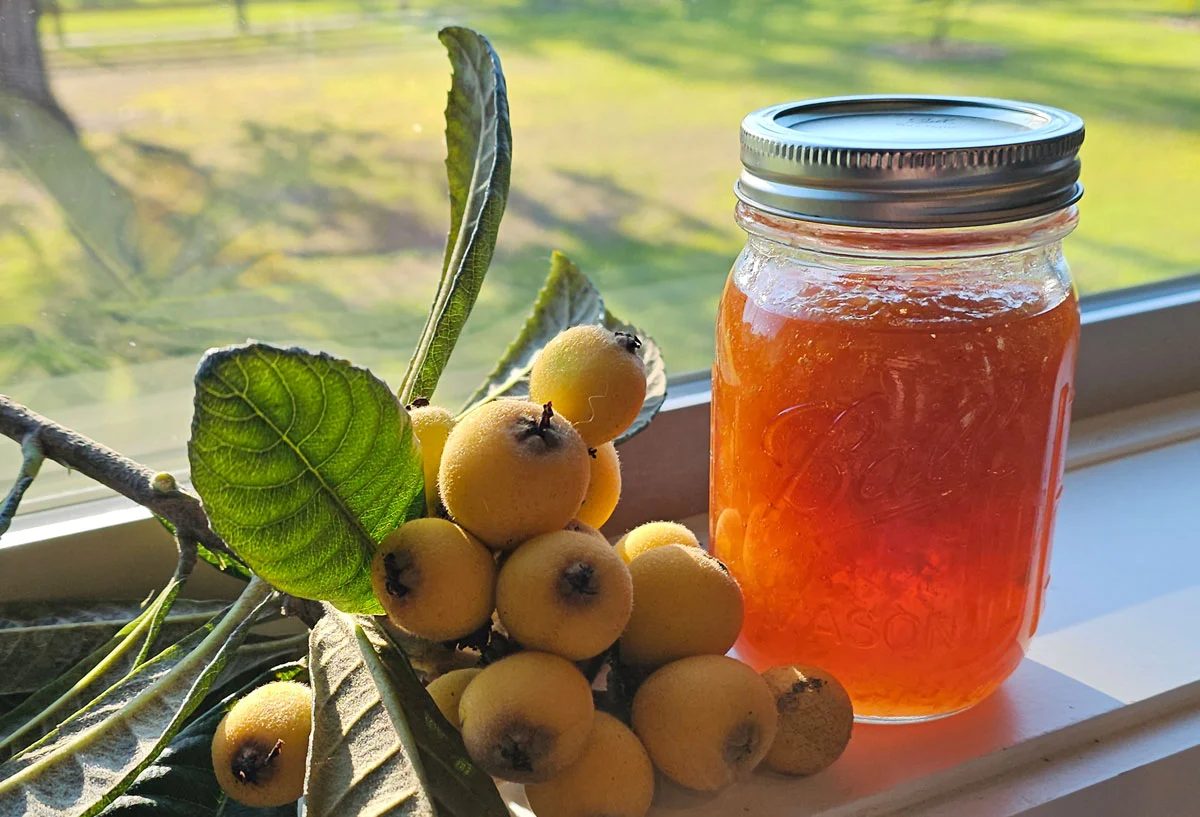
Learn how to make loquat jam using this simple water-bath canning recipe. This recipe will make approximately 5 pints of jam.
Table of Contents
Preparing Loquats for Canning
Loquats are a soft fruit similar to apricots, although much smaller. They can easily bruise and are best preserved quickly after picking. There may be some brown scrapes or scars on them, and it’s totally fine to use them. Loquats grow close together and often rub against each other or the leaves. However, if you see bruising or a possible hole where a bug might have entered, either cut around the damaged section or discard the fruit.
Because the fruit ripens gradually over a couple of months, I’ll pick them as they ripen and store the fruit pieces in the freezer until I have enough to make jam.
To prepare the fruit, I cut them in half and scoop out the large brown seeds and membrane around them. You could use a spoon or other utensil, but I’ve found it’s best just to use my fingers with a quick scrape of my thumb.
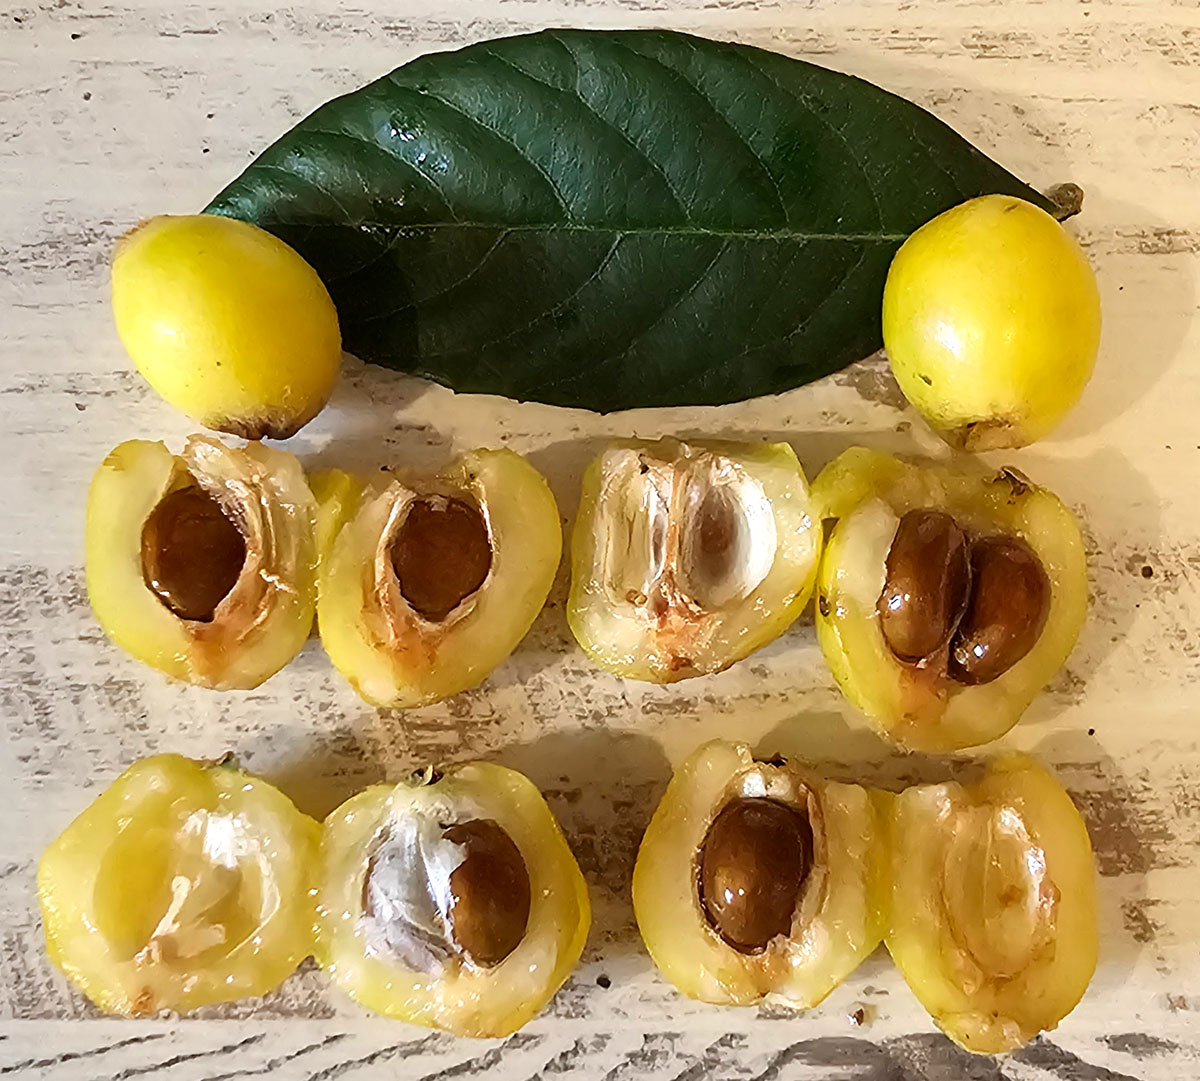
Loquats turn brown quickly (faster than apples!), so as I’m preparing them, I toss the pieces into a large bowl with 2 tablespoons of Fruit Fresh in about a quart of water. You could also use ¼ cup of lemon juice in a quart of water as an ascorbic acid alternative to help prevent browning.
After I’ve prepped the fruit, I’ll either freeze it or start the canning process. To freeze, scoop the fruit pieces into an appropriately sized freezer container and top off with the ascorbic acid liquid. When you’re ready to can them, thaw thoroughly and drain off the liquid. Proceed with canning instructions.
Ingredients
- 5 cups prepared loquat fruit
- 7 cups of white sugar
- ¼ cup fresh (or jarred) lemon juice
- 1 package SURE-GEL Premium fruit pectin
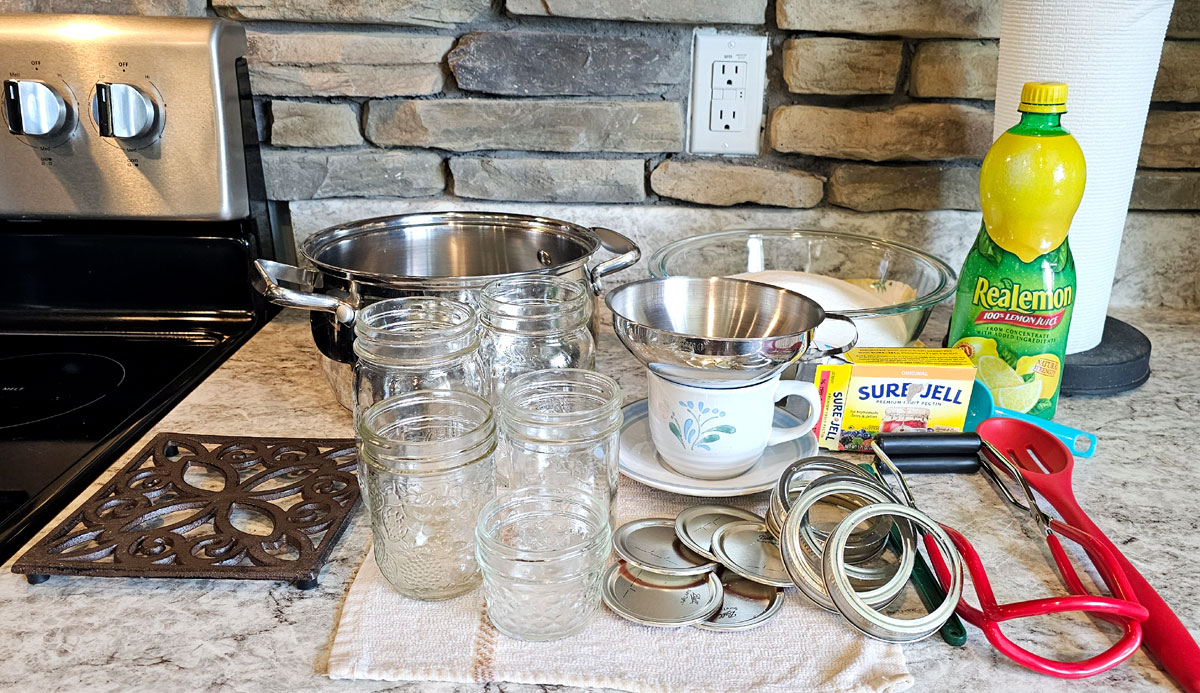
Kitchen & Canning Supplies
- Cutting board and knife to prepare the fruit
- 2 Large bowls that hold at least 6 cups each
- Liquid measuring cups
- Dry measuring cups
- Large pot to cook the fruit – 6-8 quarts
- Canning tools: jar lifter and funnel
- Water-bath canner with rack
- Canning jars – choose from various jam jar sizes – enough for 5 pints of jam
- Canning lids and rings that match your jars

Directions
Prepare for Canning
Make sure you have all your equipment and ingredients staged and ready to start canning. This would include sterilizing your canning jars and setting up an area to fill the jars before putting them into the canner.
Put enough water into the canner that will cover the jars by at least 1 inch. Bring to a simmer and keep simmering while preparing the fruit for canning.
Measure out sugar and set it aside. Have your measured sugar and pectin near the stove, ready to add in.
Start the Canning Process
Finely chop then measure out 5 cups of loquats. (I use my food processor for this step, but you can also chop them by hand.) Put the chopped fruit into the cooking pot and add the lemon juice.
Stir in 1 package of SURE-JELL Premium Fruit Pectin. Bring to a full rolling boil over medium-high heat, stirring constantly.
Add sugar all at once to the boiling fruit. Bring it back to a full rolling boil, stirring constantly.
Boil for exactly 1 minute.
Remove from heat and quickly skim off any foam.
Immediately add the fruit mixture to hot, sterilized canning jars up to ¼ inch from the top of the jar.
Wipe the jar rim and threads. Put a hot lid on top and screw on a canning ring finger-tight.
Gently set the jar into the canner using the canning jar lifter.
Process
Once all the jars are in the canner, cover and bring the water to a full rolling boil.
Process 10 minutes or adjust the time depending on your altitude. Instructions will come with the SURE-JELL package, or you can follow the directions HERE from the experts at Ball Mason Jars.
Once the processing time is done, remove the jars from the canner using the jar tongs. Place on a towel or other heat-safe surface to cool for 24 hours. I set mine on a wooden breadboard and cover them with towels to cool.
During the cooling process, the lids will produce a “ping” sound that indicates they have sealed to the jar.
After 24 hours, check the seals and remove lids. Gently clean with warm, soapy water and dry. Store in a cool, dark place. Optimal flavor and color are good for about a year. (Although mine have never stayed in the pantry that long, it’s sooo yummy to eat!)
Loquat Jam
Equipment
- 1 Cutting board
- 1 Paring knife
- 2 Large bowls at least 6 cups each
- 1 Large cooking pot 4 quart or larger
- Liquid measuring cups
- Dry measuring cups
- 1 Water bath canner with rack
- Sterilized glass canning jars, lids, and rings enough for 5 cups of jam
- Canning Tools jar lifter and funnel
Ingredients
- 5 Cups Finely chopped loquat fruits
- 7 Cups White sugar
- ¼ Cup Lemon juice
- 1 Pkg. SURE-JELL brand Premium fruit pectin
Instructions
Prepare for Canning
- Set up your canning station next to your stove.
- Sterilize glass canning jars and rings.
- Add enough water to canner to cover the jars by 1-2 inches when full. Bring to a simmer and continue simmering while preparing the jam.
- Measure out the sugar in one of the bowls and set near the stove.
Start the Canning Process
- Finely chop and measure out 5 cups of loquat fruit.
- Add fruit and lemon juice to cooking pot.
- Stir in 1 package of SURE-JELL pectin. Stirring to dissolve.
- Bring fruit mixture to a full rolling boil continuously stirring.
- Add sugar to boiling mixture and bring back to a full rolling boil, continuously stirring.
- Boil exactly 1 minute then remove from heat.
- Quickly skim off any foam.
- Begin filling hot sterilized glass canning jars.
- Wipe each jar rim clean, put canning lid on top, screw on ring to finger-tightness.
- Gently set each jar into the simmering water in the canner using the jar tongs.
- Make sure there is at at least 1-2 inches of water over the jars, cover the canner, then bring to a full rolling boil.
Process
- Boil for 10 minutes. You may need to boil longer depending on your altitude. Check the altitude instructions with the SURE-JELL package for details.
- Remove jars from the canner using the jar tongs. Put them on a heat-safe surface, cover with a towel and let set/cool for 24 hours.
Notes
FAQs
This happens to everyone once in a while. First, make sure you let the jars set for 24 – 48 hours after processing. Sometimes it takes a while to set. You can still reprocess the jam using this method by SURE-JELL. If my jams or jellies don’t set, I mark the jars and then use them as a syrup, or for making things like meat glazes or homemade sweet and sour sauces.
The recipe for freezer jam is slightly different. I’ve made loquat jam both ways, and prefer the flavor and texture of the canning method. There are instructions with the SURE-JELL package for making freezer jam also. Use the following fruit-to-sugar proportions and follow their directions: 2 ½ cups chopped fruit, 5 ½ cups white sugar, and 2 Tablespoons lemon juice.

[…] dessert like a fruitcake or homemade pie. This is a great opportunity to use up stored fruits, jams, or homegrown nuts while learning a new […]